Knowledgebase
Description
  • iAttend is an attendance tracking software that leverages WMed badges to track attendance.
  • Please see the attached documents for proper usage of the iAttend system and hardware.
To set your default internet browser on Windows:

Select
 the Start button (#1), and then type Default apps” (#2) in the search boxIn the search results, select Default apps (#3).
 

Under Web browser (#4), select the browser currently listed, and then select Microsoft Edge or Google Chrome (#5). 


When a user is accessing Epic on an apple computer/Mac within the WMed network and they do NOT have a Bronson AD or Bronson Network account,

They will need to use the following link.  

 https://citrixsf.bronsonhg.org/citrix/wmedweb

 (or configure Citrix to point to this site)

https://mycitrix.bronsonhg.org/Citrix/Prod/discovery


Remote Access from a Mac:

 External Gateway:

https://citrix.bronsonhg.org/vpn/index.html


Most Faculty and Residents have Bronson AD and Network accounts and the existing workflow will work from a Mac.  This link is used only when the user is a not a provider with Bronson privileges.


See attached


Attached is a document that will give you instructions on adding a missing punch.

Attached is a guide on how to add a Shared Mailbox to your Outlook desktop client.
The purpose of this article is to explain how to add your WMed Directory photo to your Outlook 365 (webmail) profile picture so that other WMed users are better able to distinguish who you are.  If you do this in webmail then your Teams profile picture will also be updated.


First, go to https://portal.med.wmich.edu/wmed-directory/, search for yourself, right-click on your photo, select "save image as.." and save your photo to a location you can quickly navigate to (like downloads).

Sign in to Microsoft 365 with your work or school account at https://webmail.med.wmich.edu.

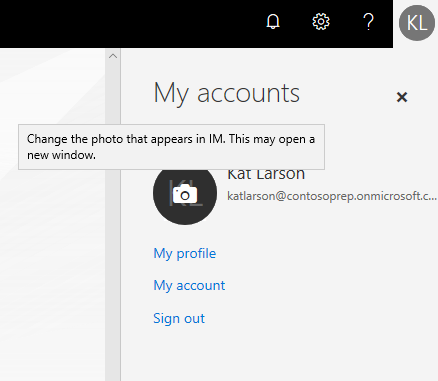
Select the circle in the upper right hand corner of the page that shows your initials or an icon of a person.  
Section of the header with the default photo image

Lastly, in the My accounts pane, click on the circle that shows your initials or an icon of a person. Change your photo in the pop-up that appears by clicking on "Upload a new photo" and select "Apply".
My account pane with a photo circle showing a hover state with camera icon


Note:  It may take a couple of hours for all of your Microsoft services to sync with your new profile picture and even up to 24 hours for your picture to be visible by others.

Apple iOS:


GO TO: Settings


Mail, Contacts, Calendars


Add Account


Other


Add Mail Account:


Name: Your Name i.e. Bill Smith

Email: User@aircare.org

Password: email password

Description: whatever you want


IMAP

Incoming Mail Server:

Host Name: email.aircare.org

User Name: your userID

Password: your password


Outgoing Mail Server:

Host Name: email.aircare.org

User Name: your userID (this is not optional)

Password: you Password (this is not optional)


You may get a message that say’s “Cannot verify server identity”  You should continue.


Verifying (this can take a minute or two NOT 5. If it does check your settings once it times out.  If the settings look right next time “Cannot verify server identity” comes up select “details” then “trust” in the upper right-hand corner of the certificate window.


Android:


Android instructions will be similar to the following, there is usually some variation between versions.

The first screen shot is for incoming mail/IMAP in Android OS

SSL must be used for Incoming , but not necessarily SSL with “accept all certificates”  If “accept all certificates” is not selected the user may have to manually accept the certificate when it pops up.


GOTO Email App

Manage Accounts

Plus Sign “+”

Others

Fill in fields


The second screen shot is for SMTP settings in Android.


Aquifer

All M2 students will receive an invitation to access Aquifer in their WMed inbox before beginning their clerkship. If you did not receive this email or would like to register for an account, contact us at Ask.Librarian@med.wmich.edu.


Aquifer (Web Browser)

Once you receive your invitation email, follow these instructions:

  1. Follow the hyperlink in the email to register and access your account.
  2. Fill in the details prompted on the registration page.
  3. Sign in to your Aquifer account once a year via your web browser to avoid account removal. Aquifer terminates user accounts after 13 months of inactivity.


Aquifer (Mobile App) 

Register online before downloading the mobile app.

  1. Search for Aquifer Clinical Learning on the Apple or Google Play store.
  2. Sign in with the WMed credentials used to register online.
  3. Connect to Wifi to download clinical cases or to sync courses.


Troubleshooting

  • If you can’t find your access invitation, contact us at Librarian@med.wmich.edu.
  • If you are receiving an Invalid Token Error when trying to set up a new password, try copying and pasting the link from your email invitation into your Chrome, Firefox, or Edge browser. There is currently a bug in Safari that is giving an “invalid token” error. If you are still have issues, submit a ticket with Aquifer Support.
  • Check your device is running on the latest OS systems. Aquifer should run on iOS 13 or later for Apple devices, or Android 7.1 or later for android devices.
  • If you encounter a black/white/blue screen while attempting to launch the Secure Exam Browser, most likely you have a compatibility issue with your device and our software, please verify that your device meets our technical requirements. *Note, the following are NOT compatible devices: tablet/ipad, touch screen device, or tablet style computer–such as a Microsoft surface or Chromebook.

Audio Digest Online (web browser)

Audio Digest Online can be accessed from any computer on or off campus at no cost to all currently enrolled students, residents, employed and community faculty, and employed medical school staff. For help registering an account off campus, please contact Ask.Librarian@med.wmich.edu.

To create an account on the Audio Digest online:

  1. Visit https://libguides.med.wmich.edu/home/mobile when connected to the WMed-Secure Wi-Fi on campus
  2. Find Audio Digest and click the hyperlink on “register here”
  3. Choose your specialty
  4. Register your account with your WMed email address
  5. Wait 5-10 minutes for your account to be processed
  6. A confirmation email will be sent to you when your account is ready. Click on the “Sign-in” button from the email to complete registration questionnaire
  7. Your subscription is ready to be used online or through the app


Audio Digest Mobile (app)

After you register your account online, visit the iOS/Android app store on your phone or tablet and search for “ADF Membership”. Login with your WMed email and password you used to register online.

*Note: be sure to download the app “ADF Membership”, not “AudioDigest” as these are two separate apps.


Troubleshooting

Ensure you login to your account on campus every 90 days to ensure uninterrupted access. If the account is only accessed off campus for a period of 90 days or longer the login will not work. If you need help logging in, contact Ask.Librarian@med.wmich.edu. .

 Please refer to the attached documentation for details on the Available Applications update. 

For access to Borgess Cerner, please fill out the attached form and return it to the appropriate contact listed within the form.

Brand and Usage Guides 

  • How we refer to ourselves
  • Preferred
  • Western Michigan University Homer Stryker M.D. School of Medicine
  • When an abbreviation is necessary
  • WMed


The Short Story

When it comes to launching a brand, consistency is key – consistency in design, text and in our name. If we expect external audiences, including the media and the general public, to refer to us correctly, we must do so internally, as well. Whenever possible, we refer to ourselves by our full name – Western Michigan University Homer Stryker M.D. School of Medicine. When an abbreviation is needed, we refer to ourselves as WMed.


In writing, the first reference should always be our full name, followed by the abbreviation in parentheses – e.g., Western Michigan University Homer Stryker M.D. School of Medicine (WMed). After this instance, the abbreviation can be used on its own when necessary. Second and subsequent references also can be ‘the medical school’ in instances when no other schools of medicine are referenced.


Some More Detail and Examples

Here is some more background on our name and abbreviation, rules of thumb and answers to frequently asked questions:


In Writing

We refer to ourselves by our full name whenever possible, especially in formal situations and documents. In writing, after the first instance if an abbreviated version of the name is required, we refer to ourselves as WMed. We should never assume our audiences already knows us, so it is important to always use our full name in the first instance. Here is an example of how to introduce the abbreviation in writing:


Western Michigan University Homer Stryker M.D. School of Medicine (WMed) recently rebranded itself.

At the event, faculty and staff also welcomed the new first-year medical students to WMed.


In Conversation

It is best to always use the school's full name in conversation with external audiences and people who are not intimately familiar with Western Michigan University Homer Stryker M.D. School of Medicine. However, acronyms and "nicknames" are often used as an internal shorthand – a way for us all to refer to ourselves without using our full name. Our internal shorthand is "WMed," and this is how we can refer to ourselves in internal meetings and informal internal communications when the full name is too cumbersome.


Why WMed?

Using a single, consistent shorthand—WMed—when an abbreviated version of our name is required will help reinforce our name – Western Michigan University Homer Stryker M.D. School of Medicine. Because our name is so close to our old name (Western Michigan University School of Medicine), using the acronym will help the change take hold internally and externally over time.


Why Does It Matter?

Acronyms, nicknames and shorthand references often build up organically, and if organizations aren't careful, these nicknames can end up causing confusion externally. Referring to ourselves consistently will, over time, cause those who are less familiar with us to also refer to us consistently by our correct name. Our name—in its full and abbreviated forms—reinforces who we are, which will help the general public become more aware of us over time. Ultimately, it helps us control our message and how we're represented to the world.

Please see the attached PDF for detail instructions.

To Enable Captioning on Video Recordings 


On the Google Chrome Internet Browser: 

    1. Click on the 3 vertical dots in the upper right-hand corner 

    2. Click on “Settings” 

    3. Click on in the bottom left corner 

    4. Toggle the “Live Caption” switch to on. It will turn blue.

    5.Click on “Caption Preferences” if you would like to customize the captions. 


This issue presents as display issues caused when trying to open a Citrix application (such as Epic) while using a laptop docked with a monitor.

Example screenshot – Your screen may look different than below, but typically you will see some part of the Epic login screen off-center from where it should be. 


To resolve this issue: 

  1. Right click on your desktop and select “Display Settings” in the menu that opens. This should open your computer's Display Settings menu.

  View 
Sort by 
Refresh 
Paste 
Paste shortcut 
Share 
View online 
Always keep on this device 
Free up space 
Intel@ Graphics Settings 
New 
Display settings

  1. Select your laptop in the Display Settings menu (Screen 1 in the example image, yours may be different). You can click the "Identify" button to assist in identifying which option is your laptop. Your screen should look like the image below, with your laptop screen highlighted in blue.

  Display 
Select and rearrange displays 
Select a display below to change the settings for it. press and hold (or select) a display, then drag to rearrange it.


  1. With your laptop selected, scroll down to the "Scale and layout" section. Click on the dropdown menu with the label "Change the size of text, apps, and other items."


 Scale and layout 
Chan e the size ofte a 
125% (Recommended) 
Advanced scaling settings 
Resolution 
s and other items 
1920 x 1080 (Recommended) 
Orientation 
Landscape

  1. Select "100%" from the menu.

  Scale and la out 
100% 
125% (Recommended) 
150% 
175%


  1. You should now be able to launch Epic with no display issues. If Epic is already open, close and re-launch it.


Project Request Form

If you'd like assistance with your next marketing/communications project, you've come to the right place. We've put together this form to get the conversation started. Once your project is submitted, someone from the Office of Communications team will follow up to discuss your project in more detail. 

Please submit your request at least six weeks in advance of your production deadline, so projects can be prioritized, scheduled, and resources allocated. 

Due to the volume of projects, the Office of Communications cannot accept every project. If your request requires a quick turnaround, we will make our best effort to provide project feedback and make recommendations for freelance support. 

Please email us at communications@med.wmich.edu with any questions.


Project Title * Required

0 of 50 max characters

Who will your project reach?

  • Internal audience (WMed employees, community faculty, current residents, current students)
  • External audience (alumni, potential employees, prospective students, hospital partners, general public, etc.)

What are the goals or purpose of this project? Please provide support for the project purpose or the desired outcome.

 Is there a budget to support this initiative?

  • Yes
  • No
  • I'm not sure
  • N/A

 Is this a recurring or one-time project?

  • Recurring
  • One-time
  • I'm not sure
  • N/A


When do you need your project completed? - must be mm/dd/yyyy format* Required

Please select your project from the lists below. 

Communications

  • Communications planning
  • Media relations (press release, news conference, etc.)
  • Social media
  • Content submission (Insider Newsletter, WMed Portal, Hospital newsletter, etc.)
  • Other ...


Other Communications Project:

Marketing

Update existing material (please attach PDF to request)

  • Brochure
  • Double-sided information card (5.5" x 8.5")
  • Event invitation
  • One-sheet (8.5" x 11")
  • Postcard
  • Stand-up banner
  • Table cover
  • Other ...

Photo and Video

  • Photography
  • Videography - Update existing video
  • Other ...

 Web

  • Content update
  • New web page
  • Other ...


WEB: Please email content related to your web request to webmaster@med.wmich.edu


Is there anything else we should know about your request?

Name* Required

Email* Required

Phone* Required

Department* Required


To gain access to HCUP:

  • Complete the fillable forms HERE
  • Complete the training HERE

 Please attach the completed form to a response to the originating support ticket.


1) Click on the gear icon in the upper right of Outlook on the Web. 

Shape

2) Click View All Outlook settings at the bottom of the menu


3) On the settings screen, select Mail --> Customize actions.


4) On the Customize Actions screen, scroll down to the Message surface settings.


5) Check the Phish Alert V2 checkbox to add the icon to the top of the Message Surface.


6) Click the Save button.

Re-Enrollment Information

If you have a new phone and automatically transferred your applications from your old phone to your new one, you will need to uninstall the NetIQ app and then reinstall it. If you do not do this, you will run in to issues when trying to re-enroll.

-----------------------------------------------------------------------------------------------
Requirements to complete

  • 15 minutes of time
  • Reliable internet connection
  • Computer
  • Smartphone
  • Cellphone number must be on file with IT


Installing the NetIQ Advanced Authentication App

1. Download the NetIQ Advanced Authentication app on your smartphone in one of the following ways:

  • Navigate to Google Play App store and search for the NetIQ Advanced Authentication app  


2. Perform the following action to install the app in your smartphone:

  • Android: Tap Install

Launching the NetIQ Advanced Authentication App

1. Tap the  NetIQ Advanced Authentication icon.

2. Accept the license agreement.

  • A message "New PIN" is displayed.

3. Specify a PIN to access the app and tap OK(The PIN code can only be numbers)

The App is now installed. Proceed with enabling fingerprint if desired, or with 'Enrolling your smartphone as a second factor'


Enrolling your smartphone as a second factor

First time enrollment requires the ability to receive one-time password (OTP) code via text message from WMed. If you do not have a cell phone number on file at WMed, a ticket must be submitted to IT Support.

On your computer's web browser

1. Navigate to the WMed Multifactor Self-Service portal by clicking here.


2. Enter your WMed username and click the Next button:


3. Enter your WMed password and click the Next button.


On your smartphone in your text messaging app

4. A text message will be sent to your cell phone number with an one-time password (OTP) code.


On your computer's web browser


5. Enter the OTP code received via text and click the Next button.

  • If you did not receive a text message with the OTP, click the “Resend” button to receive another OTP text.


6. On the Authentication Methods page, click the Add button.


7. Select Smartphone from the available second factor methods.


Warning - the QR Code must be scanned within 2 minutes of clicking the "Get QR Code" button.  It is recommended to have the NetIQ Advanced Authentication app open on your smartphone in advance.


8.Click the Get QR Code button, a QR code will be displayed.

  • If the enrollment times out, click the cancel button and restart the process.


On your smartphone in the NetIQ Advanced Authentication App


9. Tap the + icon on the lower-right of the Enrolled Authenticators screen.

10. Aim your phone at the screen to capture the QR code.


  • The screen closes automatically when a green square appears over the QR code indicating that a compliant QR code is captured.


On your computer's web browser

12. Return to the MFA Self-Service Portal on your computer, a message should state Enrollment is complete. Click the Save button.


12. The smartphone authentication method should appear in the list of available authentication methods for multi-factor authentication.


Enrollment is now complete!

Enabling Fingerprint for NetIQ Advanced Authentication App access

The Fingerprint option is only available if your smartphone device supports this functionality.

1. In the  NetIQ Advanced Authentication App, tap the  menu icon.

2. Tap Settings.

3. Set PIN to ON to enable PIN protection for your app.


3. Set Fingerprint to ON to enable fingerprint authentication.

  • The fingerprint you set for the phone is used as a touch sensor for your app.


Re-Enrollment Information

If you have a new phone and automatically transferred your applications from your old phone to your new one, you will need to uninstall the NetIQ app and then reinstall it. If you do not do this, you will run in to issues when trying to re-enroll.

-----------------------------------------------------------------------------------------------
Requirements to complete

  • 15 minutes of time
  • Reliable internet connection
  • Computer
  • Smartphone
  • Cellphone number must be on file with IT

Installing the NetIQ Authenticator App


1. Download the NetIQ Advanced Authentication app on your smartphone in one of the following ways:

  • Navigate to App store and search for the NetIQ Advanced Authentication app.


2. Perform the following action to install the app in your smartphone:

  • iOS: Tap Get

Launching the NetIQ Authenticator App

1. Tap the  NetIQ Auth app icon to run the NetIQ Advanced Authentication app.

2. Accept the license agreement.

  • A message "New PIN" is displayed.

3. Specify a PIN to access the app and tap OK(The PIN code can only be numbers)

  • A message "NetIQ Auth" Would Like to Send You Notifications is displayed.

4. Tap Allow to enable the push notification.

  • This will allow the “Push to Accept” functionality, otherwise the one-time code must be entered each time.


Enrolling your smartphone as a second factor

First time enrollment requires the ability to receive one-time password (OTP) code via text message from WMed. If you do not have a cell phone number on file at WMed, a ticket must be submitted to IT Support.

On your computer's web browser

1. Navigate to the WMed Multifactor Self-Service portal by clicking here.


2. Enter your WMed username and click the Next button:


3. Enter your WMed password and click the Next button.


On your smartphone in the text messaging app

4. A text message will be sent to your cell phone number with an one-time password (OTP) code.


On your computer's web browser


5. Enter the OTP code received via text and click the Next button.

  • If you did not receive a text message with the OTP, click the “Resend” button to receive another OTP text.


6. On the Authentication Methods page, click the Add button.


7. Select Smartphone from the available second factor methods.


Warning - the QR Code must be scanned within
2 minutes of clicking the "Get QR Code" button.  It is recommended to have the NetIQ Advanced Authentication app open on your smartphone in advance.


8. Click the Get QR Code button, a QR code will be displayed.

  • If the enrollment times out, click the cancel button and restart the process.


On your smartphone in the NetIQ Advanced Authentication App


9. Tap the + icon on the upper-right of the Enrolled Authenticators screen.

  • A message Advanced Authentication Would like to Access the Camera is displayed.


10. Tap OK.

11. Use the camera of your smartphone to capture the QR code using the NetIQ Advanced Authentication app.

  • The screen closes automatically when a green square appears over the QR code indicating that a compliant QR code is captured.


12. Specify WMed for the Account text box.

13. Tap Save on your smartphone app

  • The authenticator that you enrolled is displayed in the Enrolled Authenticators screen of your smartphone app.


On your computer's web browser


14. Return to the MFA Self-Service Portal on your computer, a message should state Enrollment is complete. Click the Save button.


15. The smartphone authentication method should appear in the list of available authentication methods for multifactor authentication.

Enrollment is now complete!

Enabling Touch ID or FaceID for NetIQ Authenticator App access

TouchID or FaceID options are only available if your smartphone device supports this functionality.

1. In the  NetIQ Authenticator App, tap the  menu icon.


2. Tap Settings.


3. Set Touch ID to ON to enable fingerprint authentication.


4. Set FaceID to ON to enable face authentication.

  • The fingerprint you set for the phone is used as a touch sensor for your app.

When do I use it?

Click the (Phish Alert Button) PAB anytime you believe you have received a phishing email or any potentially dangerous email. Any emails you report using the PAB will be automatically deleted from your inbox. The emails you report will also be forwarded WMed and Microsoft for analysis.

The PAB should only be used to report emails you believe to have malicious intent. If you are receiving obvious spam or marketing emails, you should not use the PAB. You can delete these types of emails or add the sender or sender's email domain to a block list.

How do I use it?

Depending on your device and email client, the steps for reporting an email using the PAB may vary. 

However, across all devices, the reported email will be handled the same. The email you report will be forwarded to WMed and Microsoft and then deleted from your inbox. If you report an email in error, you can retrieve the email from your Trash/Deleted Items.

Outlook on the Web

The PAB icon will appear in the drop-down menu of an open email.


To report an email as a phishing email:
    1) Click the PAB icon.
    2) A sidebar prompt will ask you if you are sure you want to report the email as a phishing email. Click the Phish Alert button to report the email.

Outlook mobile app (Android)

To report an email as a phishing email:

1) On any open email, tap the three dots at the top-right of the screen.


2) The Phish Alert add-in will appear. Tap the Phish Alert add-in.


3) A prompt will ask you if you are sure you want to report the email as a phishing email. Tap the Mobile Phish Alert button to report the email.


4) If you have successfully reported a simulated phishing email sent on behalf of your organization, a congratulatory message will display. Click 
OK to close it.


Outlook mobile app (iOS)

To report an email as a phishing email:

1) 
On any open email, tap the three dots at the top-right of the screen.


2) The Phish Alert add-in will appear. Tap the Phish Alert add-in.


3) A prompt will ask you if you are sure you want to report the email as a phishing email. Tap the Phish Alert button to report the email.


4
) If you have successfully reported a simulated phishing email sent on behalf of WMed, a congratulatory message will display. Click OK to close it.


Why should I use it?

Reporting emails will help WMed stay safer. Because the potential phishing emails you report are sent for analysis to WMed and Microsoft, WMed will now be aware of which phishing attacks are able to reach employee inboxes. Once we're aware of possible vulnerabilities, we can better defend against them. You are an important part of the process of keeping WMed safe from cybercriminals.


When do I use it?

Click the Phish Alert Button (PAB) if you believe you have received a phishing email or any potentially dangerous email. Any emails you report using the PAB will be automatically deleted from your inbox. The emails you report will also be forwarded to WMed and Microsoft for analysis.

The PAB should only be used to report emails you believe to have malicious intent. If you are receiving spam or marketing emails, you should not use the PAB to report these. You can delete these types of emails or add the sender or sender's email domain to a block list.

How do I use it?

1) The PAB add-in will appear at the top of your Outlook client.


2) A prompt will ask you if you are sure you want to report the email as a phishing email. Tap the Phish Alert button to report the email.


3) If you have successfully reported a simulated phishing email sent on behalf of your organization, a congratulatory message will display. Click OK to close it.


Why should I use it?

Reporting emails will help WMed stay safer. Because the potential phishing emails you report are sent for analysis to WMed and Microsoft, WMed will now be aware of which phishing attacks are able to reach employee inboxes. Once we're aware of possible vulnerabilities, we can better defend against them. You are an important part of the process of keeping WMed safe from cybercriminals.

When do I use it?

Click the Phish Alert Button (PAB) if you believe you have received a phishing email or any potentially dangerous email. Any emails you report using the PAB will be automatically deleted from your inbox. The emails you report will also be forwarded to WMed and Microsoft for analysis.

The PAB should only be used to report emails you believe to have malicious intent. If you are receiving spam or marketing emails, you should not use the PAB to report these. You can delete these types of emails or add the sender or sender's email domain to a block list.

How do I use it?

You will see the PAB in one of two ways:

1) The PAB add-in will appear at the top of your Outlook client.

 In this view, to report an email as a phishing email:

  1. Click the Phish Alert button while the email is open.
  2. A prompt will ask you if you want to report the email as a phishing email. Click Yes to report the email, or click No to not report the email.

2) WARNING: THIS OPTION NO LONGER WORKS WITH THE OLDER OUTLOOK 2016 CLIENT.  USE THE BUTTON AT THE TOP OF THE OUTLOOK CLIENT.

The PAB add-in will appear as a clickable 
Phish Alert tab in any opened email.

In this view, to report an email as a phishing email:

  1. Click the Phish Alert tab to open a drop-down screen.
  2. A prompt will ask you if you want to report the email as a phishing email. Click the Phish Alert button to report the email.


If you have successfully reported a simulated phishing email sent on behalf of WMed, a congratulatory message will display. Click OK to close it.


Why should I use it?

Reporting emails will help WMed stay safer. Because the potential phishing emails you report are sent for analysis to WMed and Microsoft, WMed will now be aware of which phishing attacks are able to reach employee inboxes. Once we're aware of possible vulnerabilities, we can better defend against them. You are an important part of the process of keeping WMed safe from cybercriminals.

This article is related to policy ADM16. Please visit the policy section for review and other related attachments.

 Information Access Forms are available to leadership and used to give our users the access they need to function as needed.

  • Review and complete the webform located at:
    • Form link is always available on the Employee Portal - Applications - Information Technology - 'Information Access Form'
  • or directly at:


LexiComp


Mobile App Instructions

The LexiComp app is available to all WMed students, residents, staff, and faculty free of charge. In order to access your free subscription you must register on LexiComp through the library proxy or on campus. Follow these instructions before installing the app directly to your device:

Obtaining your authorization code:

  1. Connect to the Wmed-Secure or eduroam network and browse to the library homepage and click on LexiComp under the Quick Links heading, or click here: http://online.lexi.com.wmusom.proxy.liblynxgateway.com/
  2. Click on the link Mobile Access Codes.
  3. Select your OS platform: Android or iPhone/iPod Touch/iPad.
  4. Select “New (app is not installed)”.
  5. Copy the authorization code and follow the instructions for creating your account.

Creating your account:

  1. Browse to http://lexi.com/account/create/
  2. Fill in the account details. You must sign up with your Wmed email to guarantee access.
  3. Log into the account you just created.
  4. Enter your Wmed email and password.
  5. In the Subscriptions section, locate Add a Subscription by Code.
  6. A PIN will be sent to your inbox. Follow the URL in the email and input the 5-digit code under “verify pin”. You may be prompted to login again. *Note: your PIN will expire in 30 minutes. If you do not complete activation in time, go back to the “Obtaining your authorization code” instructions.
  7. Click Finish.


Downloading the mobile app:

  1. Go to your Android or Apple app store and search for
  2. Enter your login information.
  3. Choose your preferred Lexicomp database and click update. Navigate to the three bars at the top right of the page and click home. *Note: Lexicomp databases will use a significant amount of storage on your mobile device. We suggest starting with the following databases:
    • Lexi-Drugs
    • 5-Minute Clinical Consult
    • Lexi-Tox
    • Interact
    • Lexi-CALC
    • Trissel’s IV Compatibility
  4. Your mobile app is ready for use.


Troubleshooting:

  • Ensure you’re connected to the Wmed-Secure network or accessing the Lexi site through the proxy (i.e., http://online.lexi.com.wmusom.proxy.liblynxgateway.com/.)
  • Move to a strong wifi or cellular network if you’re having issues installing the app off campus. The application is transferring a significant amount of data to your mobile device.
  • Check how much storage your device has available. LexiComp recommends having at least 2 GB of available storage to sync databases to your device.
  • Apple devices: the application requires iOS 11.0 or later installed on your iPhone or iPad. You can check whether your Apple device is running on the latest iOS by navigating to Settings > General > Software Update.
  • Android devices: the application requires OS 9.0 or later. You can check whether you Android device is running on the latest OS by navigating to Settings > About.

For always up-to-date guides on switching from PC to Mac, check out our library site: http://libguides.med.wmich.edu/GettingStarted/MacBasics.


What is MFA?

It is an authentication process that requires a user to provide two or more verification factors to gain access to a resource such as an application, online account, or a VPN. Factors are categorized by Something you know (Passwords, PINs); Something you have (Badges, Token generators, Smart phone apps); Something you are (Biometrics).

Why do we need MFA?

It can prevent most brute force attacks and phishing attempts from compromising the organization and its data. The nature of computer-based operations means that a single account being compromised can lead to significant harm to the organization, its staff, students, and patients. By enabling MFA, it becomes far more difficult to compromise an account as a username and password alone will not grant access.

Does MFA mean I’m safe from phishing emails?

No. While compromise from phishing attacks is more difficult with MFA in place, it is not impossible. The attacker will still have your password and may access systems that do not have MFA. Phishing attacks can also be used to install malware to compromise your computer. Users should continue to be diligent and utilize the Phish Alert button when they receive a suspicious email.

How Does MFA work for external access to WMed systems?

  • The Pulse Secure VPN app will require MFA authentication every 2 weeks based on device.
  • If using a browser app, you will be asked to do MFA anytime you are asked for WMed credentials. It depends on the browser as to how often this will happen. We cannot say a determined amount of time because it depends on cookies, different browsers, etc.
  • If you have applications loaded directly onto your device and you are off site those should hold for 90 days and then you will be asked to do MFA again. Examples would be if you downloaded the Team's client, Microsoft Office installed on your local device, or the Outlook desktop application.
Please follow the link for the directions for workstation certification before taking each NBME exam on your personal laptop.

https://rise.articulate.com/share/eWG48QZseY_X_DS7HMzv-tRUTdduQFnC


This guide will review steps to indicate the goods and services are approved to pay, mark items as returned or closed if they are not expected to be delivered.

OnlineMedEd Case X

OnlineMedEd Case X (web browser)

OnlineMedEd Case X is purchased individually by students as part of their clerkship education and at the direction of their instructors. This is not a resource provided by the WMed library. Ensure that you purchase the Case X package as instructors are not currently utilizing other OnlineMedEd bundles.


To create an account for OnlineMedEd Case X:

  1. Visit https://home.onlinemeded.org/ and click “Sign Up”
  2. Select Western Michigan University Homer Stryker MD School of Medicine as your institution and your class year
  3. Sign up with your WMed email address and activate your account through the confirmation email
  4. To purchase Case X, click on “Store” at the top of the homepage and click on “Add to Cart” under Case X
  5. Follow instructions for purchase

Note: Case X is a one-time purchase and grants users lifetime access. This is separate from their monthly premium subscription services.


OnlineMedEd Case X (mobile app)


OnlineMedEd currently does not offer a mobile app for Case X. The current available app is for the OME monthly premium subscriptions only.


System requirements


If the OME service isn’t operating smoothly, ensure the following system requirements are met:

  • You’re using Chrome, Safari, Firefox, or Edge in your web browser
  • Your mobile device is updated with the latest operating systems (iOS v13 or Android 11 “R”)

Please visit https://help.onlinemeded.org/ for more help or contact OME directly at https://onlinemeded.org/spa/contact.

Is there a user guide for Outlook?

Yes, you can find the attached Outlook User How To Guide. Click Here to view guide. The guide has an index so you can easily locate the specific processes you need. The guide will always accessible in the knowledgebase.

  1. Unusual, non-descriptive subject that does not fit email message
  2. Unusual, non-printing character
  3. Unusual, low contrast color scheme that is hard to read
  4. Link goes to suspicious foreign country URL

See attached documentation.


Please submit a ticket if you have any questions.

See attached documentation.


Please submit a ticket if you have any questions.

See attached documentation.


Please submit a ticket if you have any questions.

Define: Simultaneously conducting a virtual and in room meeting.

 Words to know:

  • Devio: A specific type of hardware used by WMed rooms to allow a laptop to use in the room speakers, camera, and microphones.
  • RealConnect: A service that allows distance learning conferencing hardware to connect to a Microsoft Teams meeting.

Difference between RealConnect and Devio

  • RealConnect only connects Teams Meetings to the room technology(e.g. Polycomm), Devio is service agnostic.
  • RealConnect does not require a host computer to connect the meeting, it uses the in room touch panel to manage content. Devio requires a host computer to manage the meeting. 

Locating a Room

Rooms are designated with the specific tags, Devio and Realconnect.  WMed rooms can be searched using Room Finder.

How to use Room Finder:

  1. Login to Outlook Web Access (https://webmail.med.wmich.edu)
  2. Select the ‘Calendar’ Option
  3. Select ‘New Event
  4. Select ‘Search for a room or location
    1. Select ‘Browse with Room Finder
  5. Select Building
  6. Select All Cities->Kalamazoo>WMed Room List
  7. Select ‘Features’ drop down
    1. Use the Devio and Realconnect filters to find your rooms.

Using RealConnect

  1. See Realconnect Knowledge base article

Using Devio

  1. See Devio Knowledge base article
Developing the security mindset

Each time we receive an email, we should attempt to establish a level of trustworthiness by looking at the major elements of the email using a top-down approach.  Each of these element's should be reviewed for "Red Flags". 

We must approach each email from a security mindset first and then once the email has passed our mental trustworthiness check we can proceed to conducting normal business communications.

What were the red flags of the Security Checkup simulated phishing email?


Red Flag Examination: 
  • Warning Banner: (Red Flag # 1) 
    • The email is coming from outside of WMed, but is using an internal organizational email address.
  • From field: (Red Flag # 2) 
    • This one is difficult to discern because it says that it is coming from "security@med.wmich.edu".  Unfortunately, the "From" field can be easily spoofed, so it's not always straight forward. 
    • Despite it being easily spoofed, it is a good field to compare against other email elements such as the warning banner or hyperlinks.
    • We must ask ourselves the following questions: 
      • Have I ever received an email from this account before or am I expecting an email from this account?  No.
      • Should this have a warning banner on it? No.
      • Is this something that WMed IT typically uses for communication?  No, WMed IT uses support@med.wmich.edu to communicate to the organization.
  • Date/Sent field: 
    • Nothing unusual here.
  • To field: 
    • Nothing unusual here.
  • Subject field: 
    • Neutral or difficult to tell, but it is raising the level of importance of the email, so we need to be a little more on guard and review all the elements of the email.  Attackers try to elevate importance, increase urgency, or cause fear.
  • Content:  
    • Neutral or difficult to tell, IT could be asking for a security checkup review, but this is specifically focusing on everything surrounding a person's credentials.
  • Hyperlinks:  (Red Flag # 3) 
    • This is the most significant Red Flag.  
      • The hyperlink URL is very strange (https://34.75.2o2.lol).
      • It does not match the From/Sender email address. 
      • WMed services typically utilizes the med.wmich.edu domain for it's information services.  
  • Attachments: None


See attached document for instructions on temporarily disabling Mac antivirus clients such as: Sophos, Avira, and Kaspersky.


Description

This is a guide for logging in to WMed services and applications using a smartphone for Multi-Factor Authentication (MFA).

Requirements

Ensure the App is installed on your smartphone and you are enrolled with 'smartphone' as your second factor.

Instructions for iOS

Instructions for Android

Procedure

1.  Log in to a WMed service or application in the normal way. The following prompt will be displayed if a second factor is required.


2.  Unlock your smartphone and tap the 'Authentication required!' notification.


If no notification appears, manually start the NetIQ Advanced Authentication app  (Android) or  (iOS).


3.  Unlock the app with a fingerprint or your PIN that was selected during setup.

4.  An 'Authentication request' similar to the one below will be displayed in the app. Press 'ACCEPT' if the details are appropriate and the login should proceed and allow access to the service. If no authentication request appears proceed to step 5.


5.  If no Authentication request appears after opening the app, press the hamburger button  in the upper left then select 'Authentication requests'. Any pending requests will be listed here provided that your smartphone is reachable by WMed over the Internet.


6.  For occasions where WMed MFA cannot reach your smartphone the One-Time Password (OTP) second factor is available. During Step 1 when the prompt for a second factor appears, select the link 'Offline OTP Option' toward the bottom. A text box will appear under the link labeled 'One-Time Password'. 


7.  Open the NetIQ Advanced Authentication app on  (Android) or  (iOS) and unlock using your fingerprint or PIN selected during enrollment. The One-Time Password is the 6-digit code under 'WMED\username' and next to the green dot. The code changes every 30 seconds.


If you see no code, press the hamburger  button then 'Enrolled Authenticators'. If nothing is listed here, enrollment must be completed using the links in 'Requirements' section at the top.


In the attachment you will find a 10 minute orientation document on VitalSource.


Topics covered in this document include:
  • How to sign in and access materials
  • Using key functions to enhance your learning
  • How to download your books for offline and perpetual access

Initial Setup
1. Call 4444
2. When prompted, enter the default password of 1234 followed by #
3. Follow the prompts to change your password
4. When prompted, record your full name
5. If you would like to setup a custom greeting press 7, then 1


Change Greetings
1. Call 4444
2. When prompted, enter your password followed by #
3. To set or change a custom greeting press 7, then 1
4. To rerecord your name press 7, then 6


Check voicemail from other phones


Internally
1. Call 4444
2. Press #
3. Enter your extension
4. When prompted, enter your password followed by #


Externally
1. Call 337-4444
2. Enter your extension
3. When prompted, enter your password followed by #

Kronos Workforce Ready is used for Time and Attendance functions.  Please read the attached user guide for details.


If you are needing help logging in to Epic, you must reach out to Bronson IT as they handle all Citrix/Epic user accounts. Their number is 269-341-6330.


If you need help just finding the Epic app, see the image and steps below. 


1. Open the Available Applications app on your desktop.

2. Click on Citrix Workspace to install/load it. 

    - If Citrix is missing from this menu, click on the refresh icon on the bottom-left corner of the Available Apps window.
    - If it is still missing after refreshing, contact WMed IT.


Once it's loaded, Citrix will prompt you to sign in. Your Citrix credentials should be the same as your Epic credentials. 


If you Citrix is installed but not login is coming up and you do not have any Epic icons on your desktop, you will need to either sign-in a different way or reset Citrix altogether.

1. To sign-in a different way, right-click the Citrix icon on your taskbar next to your clock. 
    
    - You may have to click the ^ in order for the Citrix icon to show.

2. Click Sign-In


To reset Citrix if it seems broken, repeat step 1 from the previous set of instructions but then click on Advanced Preferences instead. From there, you will select Reset Citrix Workspace and then hit 'Yes' on the window that comes up after. 


We have a folder that is located on the WMed Portal under "Communications" called WMed Faculty Photos. All the professional headshots for faculty and residents are located here, separated into department-specific folders.

On the WMed portal:

Select "Browse Shared Documents" along the left side menu.
Under "Shared By", select 'Communications'.
Select the "WMed Faculty Photos" folder.
Find your department and select the specific folder.
Residents have a folder within the department folder.

The direct link is: https://medwmich.sharepoint.com/:f:/r/communications/FMDocs/WMed%20Faculty%20Photos?csf=1&e=s9Pn8W

If you require a new faculty/resident photo, we have several photo shoots throughout the year. These dates, when scheduled, will be shared with your program coordinator.

Thank you.

Logo file types are broken into two main categories: vector and raster files.


EPS Files: High-Quality Print Projects 

A vector file (built and saved with a .EPS extension) is made up of lines. These lines never become pixelated, so can scale to as big or as small as you'd like.


EPS logo files should be used for materials that will be printed, including paper-printed items (e.g., brochures, posters, business cards), branding pieces (e.g., vinyl banners, signage), swag (e.g., shirts, pens, bags, mugs), and printed advertising (e.g., magazine or newsprint and billboards).


Here is a breakdown of when to use each color version:


CMYK version (also known as 4-Color, full-color, 4C, positive)

This is the preferred logo and should be used the majority of the time. It should be used for pieces that use full-color printing (e.g., brochures, advertising, collateral, etc.) The logo is considered a positive logo and should be used on white or light backgrounds.


Black version (positive)

These logos should be used when printing in grayscale (black and white materials). The logo is considered a positive logo and should be used on white or light backgrounds.


White version (also known as a reversed logo)

The white, or reversed, logo should be used on dark backgrounds, such as WMed brown. This version should be used any time the positive logos are illegible on any material. Therefore, it may be used on printed pieces, advertising, swag, etc.


PMS versions (spot color printing, positive)

PMS4625 – PMS7562 - Brown & Gold (For two-color printing)

PMS logo versions are only meant to be used for professional, spot color printing with Pantone ink (i.e., one-color printing or two-color printing). That means those are the only colors being printed on the materials. Examples of use would be for professionally-printed letterhead, business cards, swag, etc. We recommend only using PMS values when the printer is specifically requesting them (meaning they are printing in Pantone). More often than not, printers will use CMYK. Pantone printing is done with specific inks and therefore do not show up accurately on screen (digitally) or printed on a full-color (CMYK) printer. These logos should be used on white or light backgrounds.


PNG Files: For Web

PNGs are also a raster image type. Because raster images are constructed using a fixed number of colored pixels, they can't be dramatically resized without compromising their resolution.


PNG logos maintain transparency so they can be placed on different color backgrounds. They should not be used on professionally-printed materials. 


RGB

RGB Small (72 dpi): Use for full-color web projects

Black-Gray Small (72 dpi): Use for grayscale web projects

White Small (72 dpi): Use for web projects with dark backgrounds


JPEG: For Microsoft Programs

JPEGs are also raster image type. Because raster images are constructed using a fixed number of colored pixels, they can't be dramatically resized without compromising their resolution.

JPEG logos are ideal for use in such programs such as Microsoft Word, PowerPoint and other common software programs. They should not be used on professionally-printed materials.

JPEGs cannot have a transparent background so each of these logo versions have a white background and should only be used on white backgrounds.


Here is a breakdown of when to use each color version:

RGB Large (300 dpi): Use for full-color printing (e.g., Microsoft Word)

RGB Small (72 dpi): Use for full-color viewing on digital materials (e.g., Powerpoint)

Black Large (300 dpi): Use for grayscale printing (e.g., Microsoft Word)

Black Small (72 dpi): Use for grayscale viewing on digital materials (e.g., Powerpoint)


Contact the Office of Communications to request the appropriate logo for your project! 

MailChimp is a marketing email service available at https://login.mailchimp.com/.
  • Access to MailChimp is managed by WMed IT.  If you believe you need access to this service or have trouble using your account, please submit an IT support ticket.
  • Please note that all users have the same access to MailChimp. All users see all content and audiences.  However some actions, such as exporting contacts, can only be performed by an Administrator account.
Archiving contacts

WMed is billed for MailChimp use based on the number of active contacts on our account. It is up to each user to manage their audience(s) and contacts.  If you don't plan to use an audience for more than one month, please archive the contacts in order to keep our total list manageable.  The list can be un-archived when needed.

Instructions for archiving are located here: https://mailchimp.com/help/archive-unarchive-contacts/
Most popular articles 
 
Newest articles